Knit your own Santa Christmas Stocking using a pattern created with the Grid Designer! In this post I show how I made a Christmas stocking that I designed in the Grid Designer. The stocking is large and roomy with an optional lining that can be sewn in. I have made these for members of the family; this year I am making one for my youngest grandson. The free pattern is shared here (free for personal use), as well as all the instructions to make your own stocking from start to finish.
What is Grid Designer?
The Grid Designer is a new, free, on-line tool for drawing and creating colored craft charts for your own patterns. Create your own designs for knitting, crochet graphgans, C2C crochet, latch hook, cross stitch and more, using the Grid Designer! Read more about the Grid Designer.
The Stocking
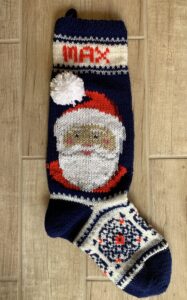
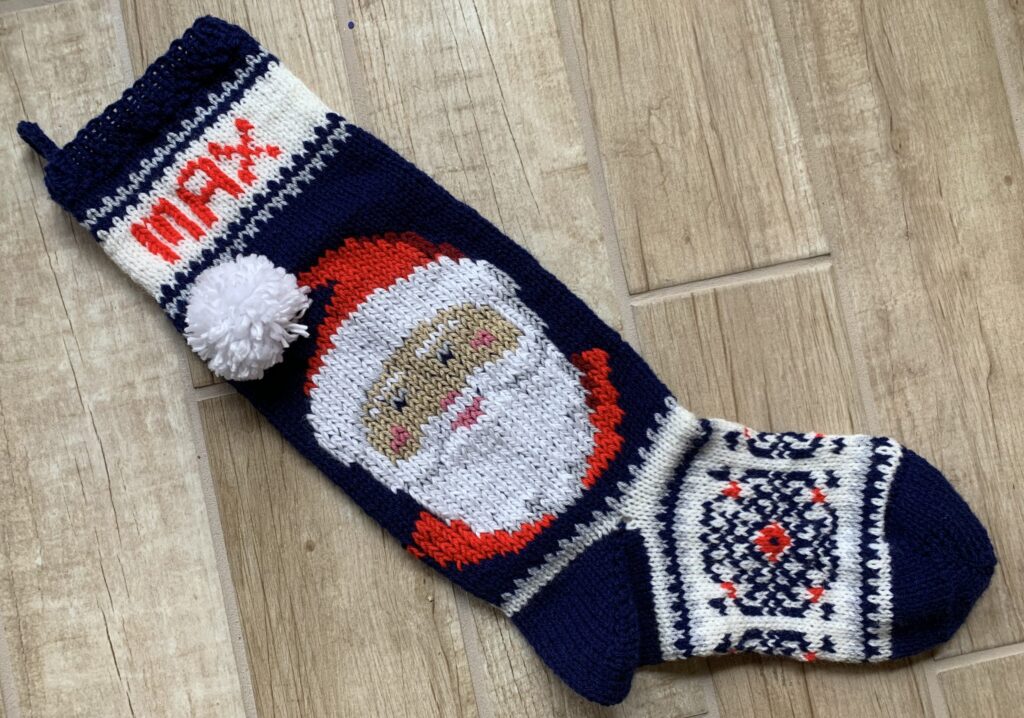
This large, roomy Christmas stocking measures about 7 inches by 26 inches when complete. It is knit on straight knitting needles and has a seam in the center back.
It is knit from the top down starting with a few rows of k1/p1 ribbing. There are two colorwork patterns, one for the top of the stocking and one for the bottom. The heel and toe are knit in the same way and a seam is sewn to attach the top of the toe to the top of the foot.
An optional lining can be made from jersey knit fabric. The lining is then attached at the top inside of the stocking and tacked to the back of the heel and toe to keep its placement in the stocking.
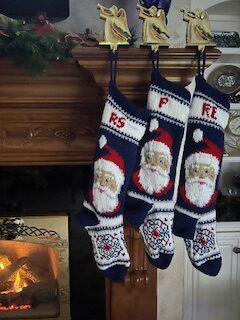
I have knit several of these with different patterns for members of the family. I will share those patterns on my blog over time. Last year I made stockings for husband and myself. You can see them by clicking here. This year I made this santa stocking for my youngest grandson.
The Colorwork
The top section of the stocking is knitted in the background blue and the Santa face is duplicate stitched on top of that. Alternatively, you can knit the Santa as intarsia and then add duplicate stitch for the beard. I did the beard in a fluffier yarn, so that has to be worked over the top of any knitting.
The bottom of the stocking is worked in fair-isle with blue and white across most of the rows. Bobbins where used for the red areas and two areas of blue near the top and bottom of the motifs.
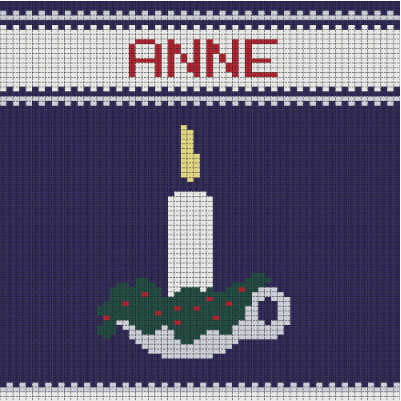
I duplicate-stitched the name on the top of the stocking where I left a white space large enough for that. You could also knit the name in.
The Pattern
Now for the real meat of this post, the pattern!
Materials
The stocking is worked in Red Heart Super Saver yarn, medium/worsted weight with the beard done in Lion Brand Hometown yarn.
These colors of Red Heart are used: soft white, soft navy, light gray, hot red, buff (face), burgundy(shading) and light raspberry(mouth, nose, cheeks). You will need a full 7 oz skein of the soft navy. The other colors are used less, I would say 3-4 oz of each of the soft white, light gray and hot red should work, with smaller amounts for the buff, burgundy and light raspberry.
A small amount of the Hometown yarn in New York White is used to duplicate stitch the white areas of the beard and hat. I had to purchase a 10 oz skein. It was used to duplicate stitch over the beard and make the pompom. This yarn is made of 4 strands wound together, I used only 2 strands to do the duplicate stitching, as this yarn is quite a bit thicker than the Red Heart Super Saver yarn.
I used size 8 needles, gauge was 17 sts and 23 rows in a 4 inch square. Keep in mind that the gauge of the stocking does not matter that much as you are not needing to make it a specific size, as you would do for something that is going to be worn. My stocking was 7 inches by 26 inches at that gauge.
You will also need a tapestry needle and yarn bobbins.
Knitting Directions
These knitting directions are also available in the form of a pdf file. Click here to open a pdf with these directions.
You should be able to download the file once it opens in your browser, by using the download button in your pdf plug-in. If that is not working for you, right-click on the link above, for the pdf, and select “Save link as…” from the context menu. That should start the download.
Ribbing
Cast on 62 stitches with soft navy.
k1, p1 across for 6 rows
Stocking Top Pattern
Knit in stockinette stitch for the length of the “stocking top” pattern (below) with the first row being a knit row. When you are looking at the pattern, know that only the center 30 stitches will appear on the front of the stocking, the sides of the stocking will wrap around and will be seamed on the center back.
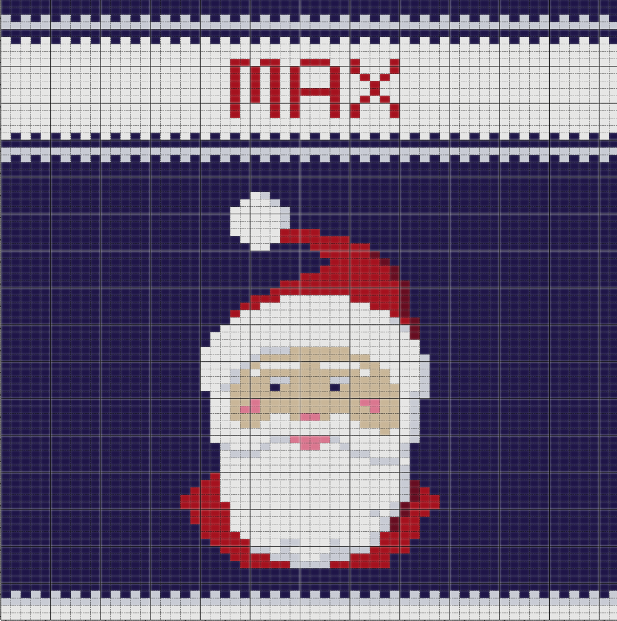
Remember you are knitting your pattern rows from the top down. Remember to turn your pattern upside-down.
Of course you want to add your name instead of mine to the top of the stocking either by knitting it in or using duplicate stitch or embroidery. I knitted plain white here and duplicate-stitched the name later.
When making this stocking, I knitted solid blue in the area where the Santa is drawn, then duplicate stitched the santa in. You could also knit him in with intarsia or use a combination of intarsia and duplicate stitch.
If you want to modify the pattern, for instance to add your name, or use the Grid Designer to print the pattern, see the following section. You can also open a PDF with this color pattern in it by clicking on this link: https://www.freese-works.com/griddesigner/shared/permanent/agnes-freese/JeJe7b.pdf
Modify the Pattern
If you would like to use the Grid Designer to modify the pattern, for instance to edit in your own name, or change the design, follow these steps or watch the YouTube video on modifying this pattern:
- Click here to open the shared project “stocking top”.
- Click the “Load project” link at the bottom of the page that is displayed.
- The Grid Designer will open in your browser and ask you if you want to load the project. The Grid Designer is free and requires no login. Click the Load button.
- The project will load your own private copy of the pattern. Make any changes you would like with the editor. See the overview playlist for information on how to edit.
- You can print it with Project -> Print.
- If you want to change the display grid, add numbering, etc. use the options under the Display menu. Also see the Print and Download YouTube video showing all the ways you can print and download a graph from the Grid Designer.
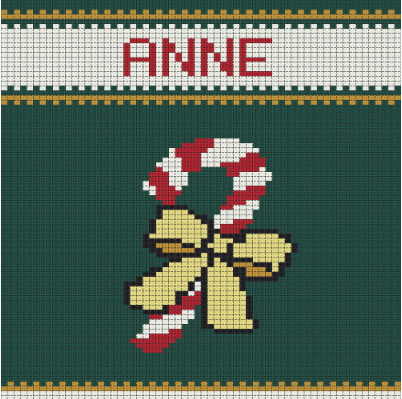
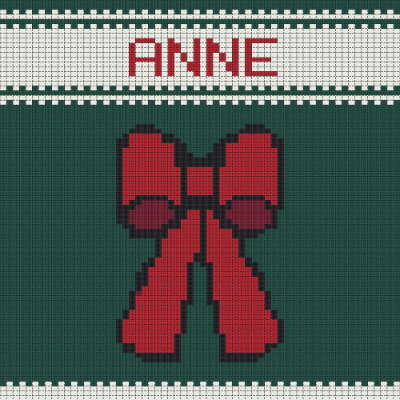
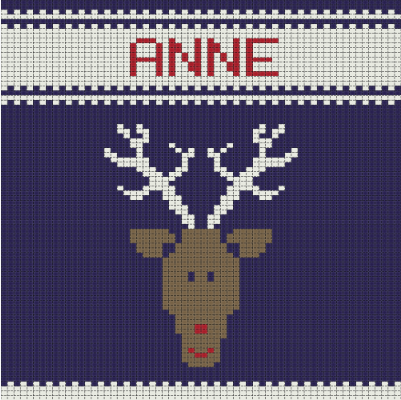
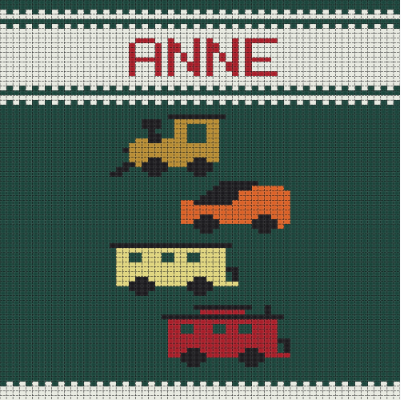
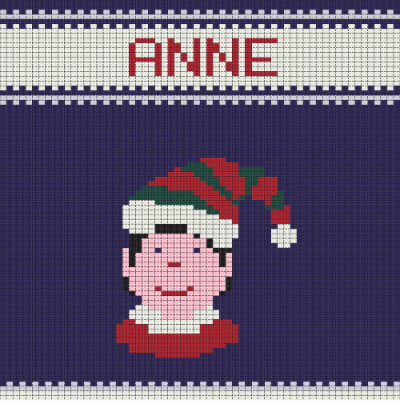
Below are some alternate patterns you might be interested in. These were created in the Grid Designer from library patterns. See how they were done in this YouTube video. For those with green backgrounds, knit paddy green into the stocking bottom instead of soft navy. All patterns are free for non-commercial use.
Click on any of these patterns to be able to download the pattern or a PDF file with the pattern and color key.

Heel
This section is used both for knitting the heel and knitting the toe.
With soft navy:
Row 1 – sl1, k30, YTF, sl1, YTB, turn
Row 2 – sl1, p29, YTB, sl1, YTF, turn
Row 3 – sl1, k28, YTF, sl1, YTB, turn
Row 4 – sl1, p27, YTB, sl1, YTF, turn
Row 5 – sl1, k26, YTF, sl1, YTB, turn
Row 6 – sl1, p25, YTB, sl1, YTF, turn
Row 7 – sl1, k24, YTF, sl1, YTB, turn
Row 8 – sl1, p23, YTB, sl1, YTF, turn
Row 9 – sl1, k22, YTF, sl1, YTB, turn
Row 10 – sl1, p21, YTB, sl1, YTF, turn
Row 11 – sl1, k20, YTF, sl1, YTB, turn
Row 12 – sl1, p19, YTB, sl1, YTF, turn
Row 13 – sl1, k18, YTF, sl1, YTB, turn
Row 14 – sl1, p17, YTB, sl1, YTF, turn
Row 15 – sl1, k16, YTF, sl1, YTB, turn
Row 16 – sl1, p15, YTB, sl1, YTF, turn
Row 17 – sl1, k14, YTF, sl1, YTB, turn
Row 18 – sl1, p13, YTB, sl1, YTF, turn
Row 19 – sl1, k12, YTF, sl1, YTB, turn
Row 20 – sl1, p12, YTB, sl1, YTF, turn
Row 21 – sl1, k13, YTF, sl1, YTB, turn
Row 22 – sl1, p14, YTB, sl1, YTF, turn
Row 23 – sl1, k15, YTF, sl1, YTB, turn
Row 24 – sl1, p16, YTB, sl1, YTF, turn
Row 25 – sl1, k17, YTF, sl1, YTB, turn
Row 26 – sl1, p18, YTB, sl1, YTF, turn
Row 27 – sl1, k19, YTF, sl1, YTB, turn
Row 28 – sl1, p20, YTB, sl1, YTF, turn
Row 29 – sl1, k21, YTF, sl1, YTB, turn
Row 30 – sl1, p22, YTB, sl1, YTF, turn
Row 31 – sl1, k23, YTF, sl1, YTB, turn
Row 32 – sl1, p24, YTB, sl1, YTF, turn
Row 33 – sl1, k25, YTF, sl1, YTB, turn
Row 34 – sl1, p26, YTB, sl1, YTF, turn
Row 35 – sl1, k27, YTF, sl1, YTB, turn
Row 36 – sl1, p28, YTB, sl1, YTF, turn
Row 37 – sl1, k29, YTF, sl1, YTB, turn
Row 38 – sl1, p30, YTB, sl1, YTF, turn
Stocking Bottom Pattern
Knit in stockinette stitch for the length of the “stocking bottom” pattern for the foot (below), with the first row being a knit row.
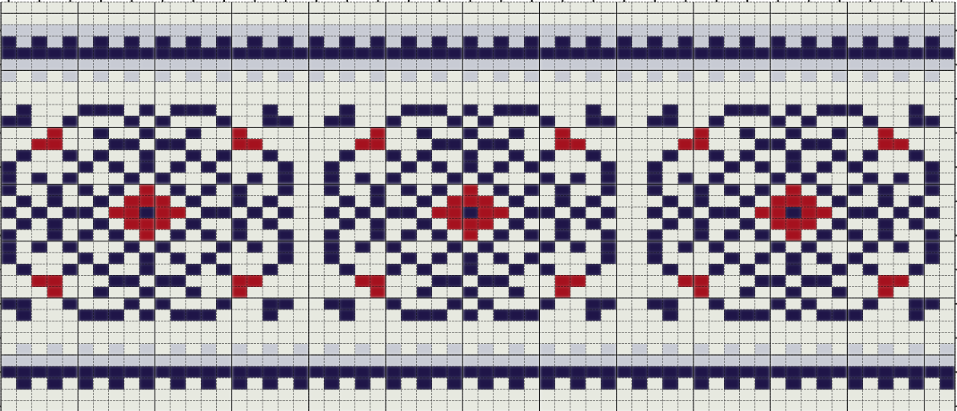
Remember that you are knitting the pattern from the top down, turn the pattern upside down to follow it.
If you would like to modify the pattern using the Grid Designer, you can load it in the Grid Designer by clicking this link and doing the same steps as for the “stocking top” pattern in this section. There is also a pdf of the stocking bottom pattern here: https://www.freese-works.com/griddesigner/shared/permanent/agnes-freese/hCFvbJ.pdf
A YouTube video will soon be available showing suggestions for how you can modify the stocking.
Toe
The toe is knitted in exactly the same way as the heel. The top of the toe is then stitched to the top of the foot.
To knit the toe, follow exactly the same instructions used for the heel in the Heel Section above.
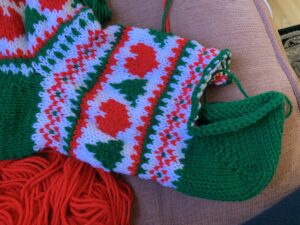
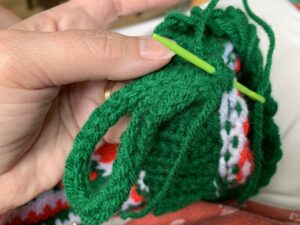
After Row 38, knit and cast off all 62 stitches, leaving a tail long enough to stitch the top of the toe to the foot. Your toe will look like the picture on the left (this is a different stocking, but same type of toe).
Half of the cast-off stitches will make the end of the foot section, the other half will make the top of the toe. These two sections now need to be stitched together to make a seam across the top of the toe/foot.
Toe Seam
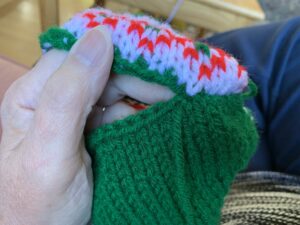
Stitch this seam by weaving the knitting together as in this YouTube video: Shoulder Seam – Bind off Edge Knit Seam.
As you stitch, the cast-off edges will turn under and the toe and foot will look like they were knitted all-together. See the picture on the left. This is a different stocking, but the same type of toe being stitched to the foot.
Add Decorations/Embroidery
At this point, before you stitch the back seam, it is time to add the duplicate stitching. For my stocking, I did the following:
I duplicate-stitched the name into the white area at the top and duplicate-stitched the Santa face onto the blue area of the stocking top.
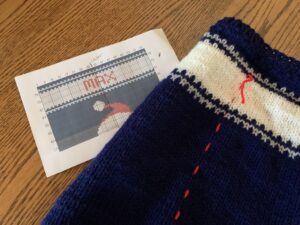
I first added a temporary piece of yarn stitched vertically down the middle of the blue and white areas to mark the center of the pattern. This was placed between the 31st and 32nd stitches. I could then count stitches from the center line to add the name and face in duplicate-stitch. I removed the center stitching as I worked.
For the beard and white areas of the cap, I used 2 of the 4 strands in the Hometown New York White yarn. The 4 strands are very loosely twisted together and it was very easy to split it into 2 strand pieces. You can either duplicate stitch the ball on the top of the hat, or make a pompom for it later.
Weave in Ends
Even if you add the lining described below, you will still need to weave in ends to make sure that nothing comes loose. Weave in any ends you need to at this time.
Here are some videos on weaving in tails for reference.
- Reverse Duplicate Stitch // Technique Tuesday by Roxanne Richardson
- Knitting Help – Weaving in Ends by VeryPink Knits
In the duplicate stitch areas, I generally weave in the yarn by stitching it around the back loops of the duplicate stitches, rather than trying to weave it through the knitting. A word about the Hometown yarn: this yarn is quite silky; some people prefer to tie knots on the back side when duplicate stitching. This will NOT work with the Hometown yarn. It is quite slippery and the knots will come loose. Be sure and weave the yarn ends in for this yarn.
Sew Back Seam
Once all decoration or embroidery is done, stitch up the back seam. The stocking is knit so that there is a full stitch on each side that can be enclosed in the seam. You can do either the half-stitch or full-stitch weave to sew the seam. See this video if you are new to stitching seams: Sweater Finishing: Perfect Sweater Seams. Weave in the ends of the yarn you are stitching with.
Add Hanging Loop and Optional Pompom
Create 3-stitch I cord that is 30 rows or so long (Here is a YouTube video showing how to make a 3-stitch I-cord with circular needles. Here is a YouTube video showing how to make I-cord with straight needles). Since I also crochet, I sometimes make a simple loop made from chaining, this will work also for the loop.
Knit and cast off the last row leaving a tail long enough to use to stitch the loop to the stocking.
Fold the I-cord to make a loop and sew the bottom edges inside the top left edge of the stocking just below the ribbing. The picture on the left is a different stocking, but same process for making the loop.
The pompom was made using the Hometown New York White yarn. I made it using two cardboard circles 3 inches across as in this YouTube video.
Lining Instructions (optional)
I personally like to add a lining to knitted stockings, especially if they are intended to be really used to hold small presents on Christmas Eve. Linings are particularly good in stockings made for children, as the presents can’t get caught on any of the knitting floats on the back side of the stocking.
Here are my directions for making the lining. I have placed these into a separate page that I can reference for all my stockings in the future.
To create the lining follow the instructions here.
Have a question? Leave a comment below.
If you make the stocking, I would love to see a picture of it! You can contact me through my contact page to get my email address, then send me your picture!
Here is a picture from Carla Steckline. A beautiful job of intarsia done on the santa face!
More beautiful stockings from Carla this year!! 2024

More Info
See the Overview playlist on youTube for more information on the Grid Designer.
If you are ready to start the Grid Designer to create your own project, click here.
As always, if you have any questions or comments, leave me a message below or go to my contact page to email me.
See my other Christmas stocking patterns by clicking here.
Have been making Christmas stockings for years but my instructions are totally different. Would love having your pattern to try making your version of the stocking. Thank you in advance. Looking forward to seeing the pattern.
Hi Lina, The pattern is contained on the web page above. It can also be downloaded as a PDF. Here is the link to the pdf: https://freese-works.com/griddesigner/pdfs/Free_Knitted_Santa_Christmas_Stocking_Pattern.pdf