In this post I will discuss the Fill and Outline drawing tools for the Grid Designer. This post is a continuation of the post on Drawing Tools – Part 2, Line and Shape Tools. Click here to read that post. If you have not read Part 1, you should read that before you read this post as there is important information there. You can read part 1 by clicking here.
Additional Information
You can see the tools in action in the Overview – Drawing Tools youTube video which you can launch by clicking here.
In addition, more information about the Drawing Tools is available in the main documentation.
Getting Started
I will start with the default project, as I did in Parts 1 and 2. To get to the default project, if you are following along, simply press the browser’s refresh button. If there are edits on your grid that you want to keep for later, you can save by selecting Project -> Save from the top toolbar before pressing the refresh button.
If you want to try out the tools as I describe them, you can open the Grid Designer in another window by clicking here.
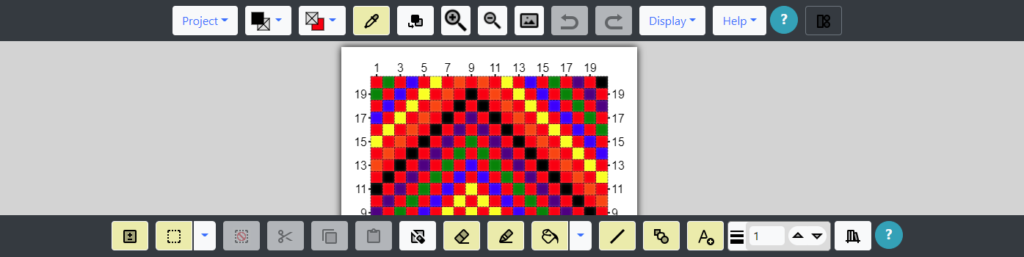
Fill and Outline Tools
The Fill and Outline tools are located in a popup that can be seen by clicking the blue arrow next to the fill bucket icon ![]() on the bottom toolbar. When you click the blue arrow, a popup will come up that looks like this:
on the bottom toolbar. When you click the blue arrow, a popup will come up that looks like this:
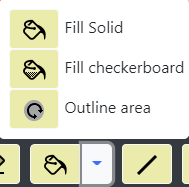
Currently there are 3 options in the popup:
- Fill Solid – fills an area with a solid color. Left mouse button fills with foreground color, right mouse button fills with background color.
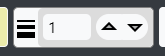
- Fill Checkerboard – fills an area with a checkerboard. Checks are the foreground color and are interspersed with whatever existing color is in the area. The size of the checks is controlled with the line width value
 .
.
- Outline Area – draws an outline at the edges of the area selected. Left mouse button draws the outline in foreground color; right mouse button draws background color. The thickness of the outline is controlled with the line width value .
When you select an option from the popup, it then becomes the default option on the bottom toolbar.
Create a Drawing to Fill
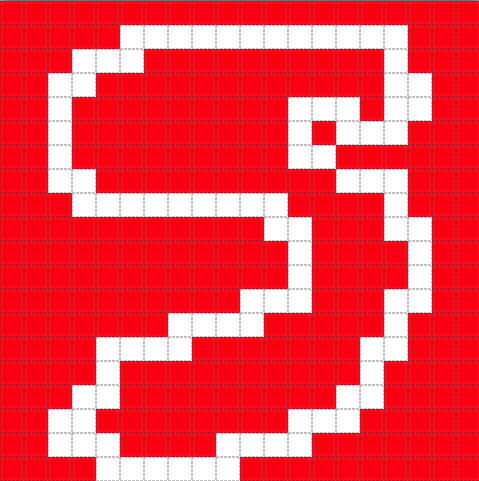
Let’s create some examples of the use of all of these buttons. First I need an object to fill, so I will use the draw/pencil tool to draw a random object that is closed all the way around.
You can do the same, if you have the Grid Designer open.
Make sure you don’t have any open gaps in your drawing. I drew something a bit squiggly, just so I can see exactly what the fill and outline tools do.
You can also create a shape to fill by using the shape tool.
How to Fill with a Solid Color
Now, I click on the default fill tool on the bottom toolbar, or from the popup. It becomes green when it’s active ![]() . The mouse changes to a little bucket icon. A hint popup may appear (See more on hint popups here).
. The mouse changes to a little bucket icon. A hint popup may appear (See more on hint popups here).
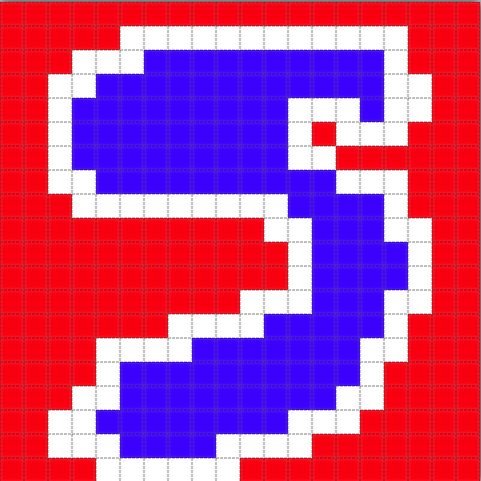
I change my foreground color to blue, and click the left mouse button somewhere inside the blob I drew. It fills with blue (Figure “Fill Inside”).
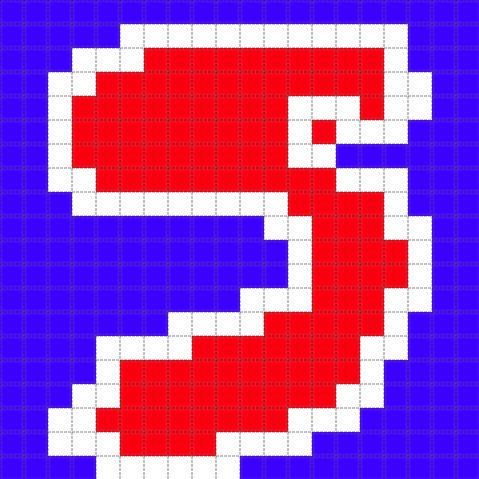
If I then undo once, and click outside the blob that I drew, I get the outside filled with blue (Figure “Fill Outside”).
I can also fill with the background color by using the right mouse button.
Give it a try, if you have the Grid Designer open!
How to Fill with a Checkerboard
Now let’s try the checkerboard tool. I undo the blue fill we did above, and start again with the checkerboard tool. Select the Fill checkerboard option from the popup next to the fill button. ![]()
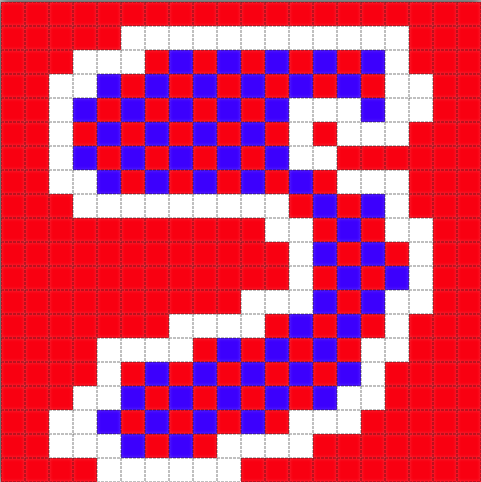
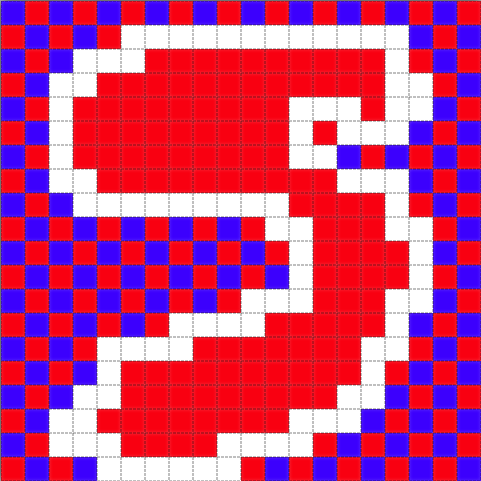
With my foreground color set to blue, I click first on the inside of my blob area (Figure “Fill Checkerboard Inside”), then undo, and click on the outside of my blob area (Figure “Fill Checkerboard Outside”).
You can change the size of the checks with the line width value ![]() on the right side of the bottom toolbar. Try it out, if you have the Grid Designer open!
on the right side of the bottom toolbar. Try it out, if you have the Grid Designer open!
With checkerboard fill, it does not matter which mouse button I use, they both use the foreground color. The foreground color is interspersed with whatever color exists in the area. If the area was filled with yellow and the foreground color was blue, background color was red, I would get blue and yellow checks. The background color is not used in producing the checks.
How to Outline an Area
Now we have one more tool to try out, that is the outline tool. I select it from the popup next to the fill bucket icon. ![]() It becomes green when active. I undo my checkboard fill until I have my original blob drawing.
It becomes green when active. I undo my checkboard fill until I have my original blob drawing.
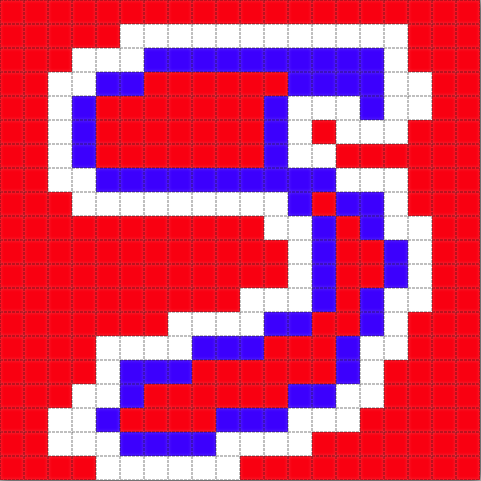
With my foreground color set to blue, I again click inside and outside my blob. This draws a blue outline either on the inside (Figure “Outline Inside”) or outside (Figure “Outline Outside”) of the blob.
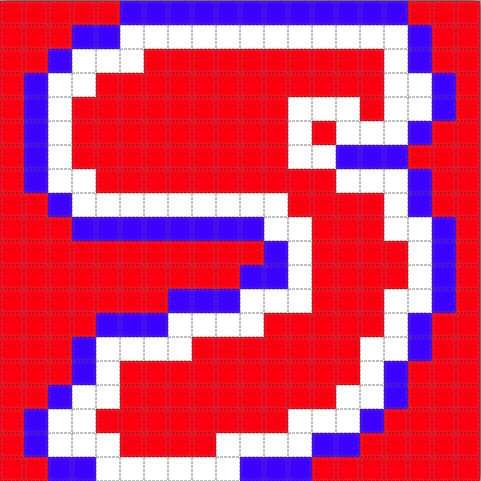
The thickness of the outline can be controlled with the line width value. Using left mouse button draws foreground color, using right mouse button draws background color.
Try it out, if you have the Grid Designer open!
The outline tool is excellent for drawing an outline around shapes, letters, etc!
Continue Reading
Continue reading with Grid Designer Drawing Tools – Part 4, Drawing Text.
OK first and foremost thank you for this free designer…a bit challenging for me I’m challenged with any type of measuring LOL!
I have my design on grid, a photo I can’t seem to get the letters in the boxes to print out; that tell me what color in what box!?
Thank you for any input…still learning!
The letters can be turned on by going to Display > More Options. Select the checkbox labeled ‘Print Symbols Over Colors’. The symbols will not appear on the regular display, but they will appear when you print the project or download it from the Project > Print or Project > Download options. There is an example in this youtube video: https://youtu.be/WDKWXpVu6Ag on printing and downloading.
I plan on adding the options to turn on the letters to the print and download options in the future, but have not yet had the time to get that done. Thanks for your question and thanks for using the Grid Designer!