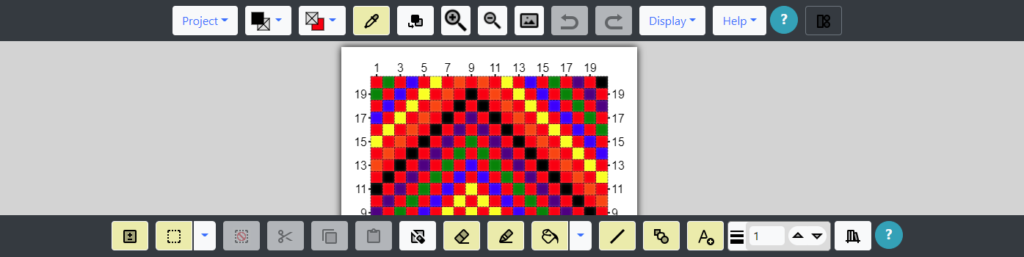
In this post I will discuss the Line and Shape drawing tools ![]() for the Grid Designer. These are located on the bottom toolbar. This post is a continuation of the post on Drawing Tools – Part 1, Draw and Erase. You should read that post before you read this one. There is information in part 1 that you should know before your read part 2.
for the Grid Designer. These are located on the bottom toolbar. This post is a continuation of the post on Drawing Tools – Part 1, Draw and Erase. You should read that post before you read this one. There is information in part 1 that you should know before your read part 2.
Additional Information
You can see the tools in action in the Overview – Drawing Tools youTube video which you can launch by clicking here.
In addition, more information about the Drawing Tools is available in the main documentation.
Getting Started
I will start with the default project, as I did in Part 1. To get to the default project, if you are following along, simply press the browser’s refresh button. If there are edits on your grid that you want to keep for later, you can first save by selecting Project -> Save from the top toolbar.
If you do not have the Grid Designer open and want to try out the tools as I describe them, you can open the Grid Designer in another window by clicking here.
Drawing Lines
Lines can be drawn with the line tool ![]() . The line tool can be used to draw lines in both the foreground and background colors. When it is selected, the left mouse button draws the foreground color; the right mouse button draws the background color, same as with the draw/pencil tool. If you are on an iPad or iPhone, there is no way to draw a line in the background color. To switch colors, you must set the foreground color.
. The line tool can be used to draw lines in both the foreground and background colors. When it is selected, the left mouse button draws the foreground color; the right mouse button draws the background color, same as with the draw/pencil tool. If you are on an iPad or iPhone, there is no way to draw a line in the background color. To switch colors, you must set the foreground color.
How to Draw a Line
Click the line tool button ![]() , located on the bottom toolbar. It becomes green
, located on the bottom toolbar. It becomes green ![]() to show it is active . A hint popup may come up (see more on hint popups here).
to show it is active . A hint popup may come up (see more on hint popups here).
To draw a line on the grid, with the line button active, press the left or right mouse button down on the cell you want the line to start in, then drag the mouse to the cell you want the line to end at (while holding the mouse button down). If you are on an iPad or iPhone, press gently and drag your finger on the grid. Lift your finger where you want the line to end.
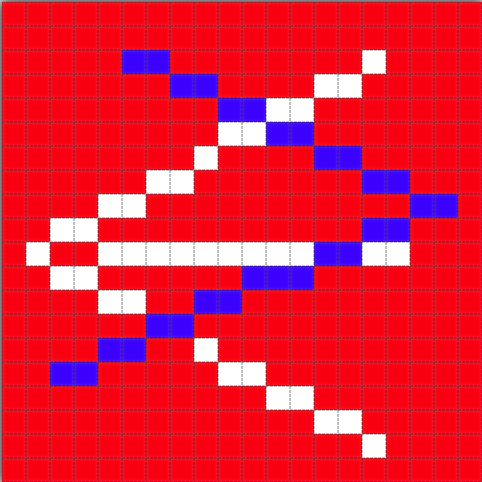
In the figure “Drawing Lines” I show some lines I have drawn with the line tool. Give it a try if you have the designer open.
Change foreground and background colors and try out the left and right mouse buttons.
Things to try
Also, note that the line width ![]() can be used to increase the width of the lines drawn. The width can be set from 1 to 10. Try it out if you have the designer open.
can be used to increase the width of the lines drawn. The width can be set from 1 to 10. Try it out if you have the designer open.
Note that the undo and redo buttons will undo and redo line drawings. Give that a try. ![]()
Drawing Shapes
Shapes can be drawn with the shape tool ![]() . As of writing this post, the shape tool can draw squares, rectangles, circles, ellipses, two kinds of triangles, diamonds, hexagons and octagons.
. As of writing this post, the shape tool can draw squares, rectangles, circles, ellipses, two kinds of triangles, diamonds, hexagons and octagons.
I will be adding to the list as I work on the Grid Designer. The next shape I want to add is a heart! I think a rounded rectangle, with the corners rounded, would also be a useful shape. Leave me a comment below if there is something you would like!
I am going to first clear out my lines by setting red as the background color, then selecting Select All, then Clear All, as described in this section of my first post. Now I have a blank 20×20 grid.
How to Draw a Shape
The shape tool ![]() is located on the bottom of the toolbar, towards the right side. It’s the one with the squares and circles on it.
is located on the bottom of the toolbar, towards the right side. It’s the one with the squares and circles on it.
Click the shape tool button; it will bring up the Select Shape dialog and the button will turn green to show it is active.
Select Shape Dialog
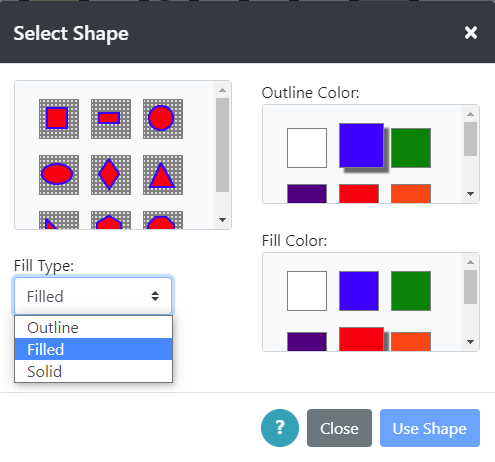
You can draw all shapes with 3 different fill types:
- Outline – Draw the outline of the shape only, with no fill.
- Filled – Draw the outline in one color and fill with another color.
- Solid – Draw the shape as a solid in one color.
Select the fill type you want. Select the shape you want. Then select the color you want for the outline/fill colors.
The colors selected will initially be set to the foreground and background colors you had selected when you clicked on the shape tool. But you can select any colors you want for your shape without affecting the foreground and background color settings!
As you change fill type and colors, the shape icons in the upper left of the dialog will redraw to show you exactly what your shape will look like when drawn.
When you have the shape, fill and colors you want selected, click the Use Shape button. The dialog will go away and you can now drag a shape on the grid, in the same was as you were dragging lines above. Right and left mouse buttons do not matter here, it draws the colors you selected in the dialog.
A hint popup may come up (see more on hint popups here).
Draw Shape on the Grid
Press the mouse button down where you want to start the shape and drag with the button down, across the grid. When you pause, with the button still down, the shape will draw into the shadow area that is first drawn while you are dragging. When you have the shape size that you want, let the mouse button up. You do not have to get the shape in exactly the right place, as you will be able to move it when you let the mouse button up. You do need to get it to be the right size before you let the mouse button up.
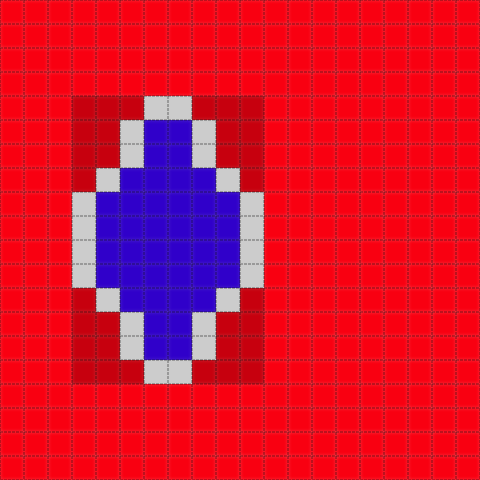
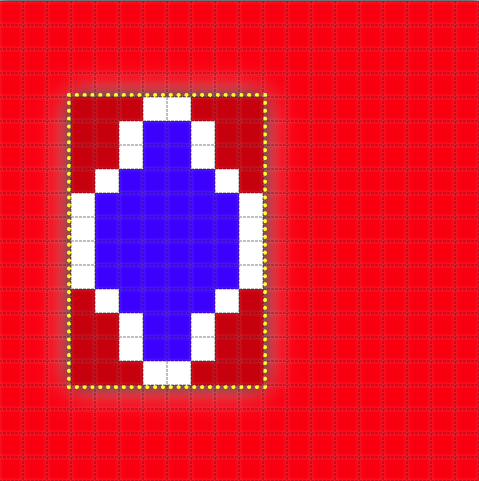
In the figure “Dragging”, I am dragging a diamond shape with white outline and blue fill. The shadow area outside the diamond draws first to show the area you are dragging over, the diamond draws when you pause with the mouse.
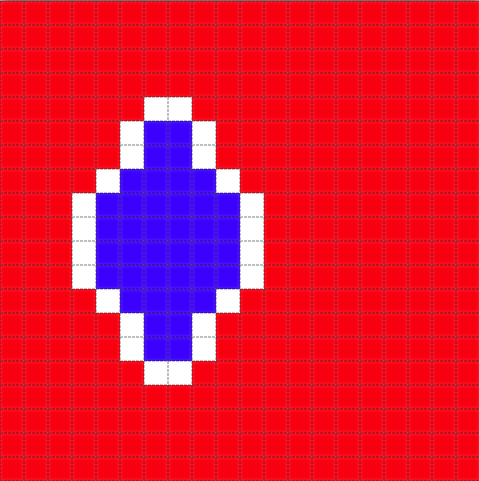
In the figure “Mouse up” is the diamond after I let up the mouse. I can now drag it around the grid to place it wherever I want.
Paste Area
When you let the mouse up, the buttons on the bottom toolbar change also. You are in the paste tools area now. The floating diamond is called the “paste item”. You can grab the paste item with the mouse and move it where you would like.
There are many other things you can do with the paste item in the paste area, such as rotation, flip, enlarge, shrink, resize, etc. These will be covered in a later post. For more information see Paste Tools in the documentation.
For our purposes here, click the blue button on the toolbar. The apply button >> ![]() .
.
The blue apply button applies the “paste item” to the grid. And now we have our shape on the grid!
Things to Try
If you have the Grid Designer open, give it a try. Select several different shapes, different colors, different fill types, etc.
Notice that the undo and redo buttons ![]() will undo and redo the shape applied to the grid.
will undo and redo the shape applied to the grid.
If you want to get back your shape to paste it again, you can click the paste button ![]() on the bottom of the toolbar.
on the bottom of the toolbar.
You might also try out some of the buttons in the paste area, just to see what they do. The help button on the paste toolbar, the ? in the blue circle ![]() , will take you to documentation for the paste area, if you would like to read ahead!
, will take you to documentation for the paste area, if you would like to read ahead!
Continue Reading
This post is continued in Drawing Tools – Part 3, Fill and Outline Tools.
how do I change the size of my project
Hi Joanne,
You can change the grid size by using Display > Grid Size. The default options will simply add or subtract rows or columns, leaving your picture the same size.
There are also checkboxes where you can resize your picture to scale to the new size and you can keep the aspect ratio the same if you want also.
This video shows some of the options: https://youtu.be/wCG8cFyI8YY – this is the resize and rescale video on my youtube channel.
Let me know if you have any other questions.
Agnes